Tuesday, August 30, 2016

Making Great Bread - Part 2 - Equipment

Now you have decided that you DO want to make Great Bread and you have a 'taste target' to shoot for - What is it that you will need to do?

I have come up with 3 basic steps in addition to eating your own bread.   You MUST eat your own bread.
If you don't cut it; taste it; evaluate the crust, crumb and taste, how do you know what you are producing?  
Of course you will see it,  so you can evaluate the looks (and compare your bread to the product of your favorite bakery), but as we said last time, looks aren't important unless it tastes good.

So - what's ahead of you in your journey to make Great Bread?  What can you expect?

You should plan on:
- Practice, practice, practice
- Focus on your style
- Use basic equipment
- Read what others are doing

Practice
Yes, you will need to practice and practice a lot. Even if you only strive to create one variety of bread, it's going to take practice to work out the kinks. But, plan also on practicing to figure out which recipe you will follow. After a bit of time, you will realize that there are recipes that you want to follow over and over - and there are other recipes that you never want to make again.
Items to consider in the recipe:
- Number of ingredients
- Accessibility and shelf life of ingredients
- The time it takes start to finish, interrupted or uninterrupted
- Batch size and whether it can be halved or doubled without issue
- Oven time, counter space, tools and cleanup required
- Sensitivity and precision required
Many of these things can be assessed as you read the recipe.
Why are they important? Example - While I would love to use whole cream in my breads, I don't want to keep it in the refrigerator and have to 'use it up' before the due date. So, I stay away from recipes with whole cream (or refrigerated products for the most part). And, if you don't enjoy making the recipe, you won't look forward to making it. And, if conditions have to be right in your home to enable adequate counter space and oven time or if making your recipe results in a giant mess that no one likes to clean up, the recipe will probably not be a 'go to' bread recipe.
Your Style
Practice also relates to the style (the next item). It's a sort of a 'chicken and egg' thing: as you practice and try various recipes, you will develop your style - and as you develop your style, you will gravitate to recipes that reflect that style.
In the beginning, I didn't know what they meant by style. But, as you taste different breads and try making them yourself, you start realizing that there are similarities to the ones you like. Some examples include sourdoughs (or naturally levened breads though they are not necessarily sour); dutch oven breads; no knead breads; lean breads(little sugar or fat); rich breads (containing eggs, sugar, oil). Also, one could specialize in breads of a particular nation: French, Italian or other breads. There are other breads with nuts, whole grains, dried fruits and even vegetables that may grab your interest.

And, what do you want your finished product to look like? Like the wonder bread loaf (using loaf pans)? Like bread from an artisan market (round and oval and long like french bread)? Like muffins - made in single serving portions? Each of these is baked separately. If you use no pan, then you need to make a loaf that is 'firm enough' to 'stand' on it's own while the oven warms it up and bakes it into it's shape.

Inherent is this 'shape' decision is the 'use' of the bread. An artisan loaf needs to be cut and every piece is a different size than the previous - so the sandwich eater needs to be a little tolerant. Also, those sandwich bags were made for square slices.

As you practice your bread making skills, you will have an affinity for certain types of breads and your style will become apparent.
What is best? The best style is the style you like to make and which you and those close to you like to eat.
Basic Equipment
Like any hobby, there are lots of people trying to sell you 'essentials' to making it easier for you to make better stuff. Bread making is no different. Of course, some of the things (like a a dutch oven) are essential to a certain style of baking and you don't know that you don't want to make that style without having tried the equipment.
Here's a list of where you might want to put your dollars - and then a list of some places where success is less certain:
A digital scale - Once you decide you are going to bake bread, you need a digital scale. The scale allows you to measure your ingredients on a consistent basis. While a cup measure may include more or less flour depending on how compressed the flour is, a gram is a gram is a gram of flour. A side benefit is that you don't have to clean up measuring cups as you can simply put your mixing bowl on the scale and add in your quantity of each ingredient. My scale has a readout that can be moved away from the base unit so you can read it even if you use a wide diameter mixing bowl.
If you have anyone in the house who has tried one of those 'point based diets', you may already have a digital scale. Use what you have and see where it gets you.
A quick read digital thermometer - How do you know when your bread is done baking? They say that you can turn the hot loaf upside down and thump the bottom. If it gives you a hollow sound, it's done. Also, it's done when it hits 195º to 210º F, depending on the recipe. I see the lower temp with whole grain breads and the upper with light breads. I generally go for 200º as my sign of done - and I haven't had a problem.
They sell 'instant read' digital thermometers for under $10 that take 15 or so seconds to read the temp. That's not instant when you are sticking your hand in a 500º oven. It may be what you use until you are ready for the big investment - but you take your loaf out of the oven to check the temp.
That primo thermometer is costs a little under $100 and is really instant read. If you are baking (and checking) 8 loaves a week, you will appreciate the real instant read capability.
A good sharp bread knife - Every loaf of bread needs to be sliced whether it is into sandwich slices or hunks. Your knife can make it a cinch, or a chore. The good news is that you can get a very good bread knife for under $10. I got mine at the Costco Business Center. Today, you can't buy one at a time, but you can get 2 for $12. An offset nylon handle and serrated blade, it can be sharpened with a stone. And, if you can't sharpen it (for some reason), buy another.

A baking (or pizza) stone - The whole concept of baking bread is based on heat transference. The hot oven brings the cool dough up to temperature, drying it as it heats. The bottom of the bread should set up before the top. Any expansion of the dough (oven spring) as the dough comes up to temperature should be toward the top and not the bottom. One way we see to this is to have a stone at the bottom of the loaf. The stone absorbs a lot of heat and then transfers it quickly to the base of the loaf.
A spray bottle - this is used to 'mist' the oven. A humid atmosphere allows the outer crust to stay soft to allow oven spring to come out the top (where the dough is slashed) rather than at whatever weak spot it can find (often, the side).

A pie tin - Used to put a little water into the oven where it will turn to steam - in addition to the spray bottle.

A couple of buckets or mixing bowls with a lid - kind of obvious that you need something to mix the dough in (if you are not using an electric mixer). The buckets are used to store the mixed dough as it ferments (from 1 hour to 24 hours). The buckets should 'fit' your batch size. In the beginning, if you don't have a lid, you can use plastic wrap or even a damp towel. The dough is covered so it doesn't dry out. It's important that the container be plenty big - so that it can expand as it needs to without inhibition.

Cooling Rack - With enough space to allow two batches of bread from your oven to cool.

Electric Mixer - This relates to style of bread, for most people. For others, working the dough by hand is not realistic. I find that hand kneaded dough and machine kneaded dough perform differently (at least in my kitchen). The machine kneaded dough is generally lighter/fluffier. But the hand worked dough (I do a 'no knead plus' approach) has a more satisfying 'bite' to it. It may not be as fluffy and tall, but it is rich and meaty. I would suggest that you borrow a mixer (like a KitchenAid) from a friend to find out whether you 'need' one for yourself. But, you don't need a mixer to make great bread. Look at the no knead videos on youtube. Thought they are usually one or two loaf batches, you can do the same thing with 4 pound batches, as long as your mixing bowl will handle that much flour (about one kilo).

Beginner Items?
If you are just starting out and don't know if this journey will go anywhere, try these starter items (without buying anything):
an oven proof pan with cover - 3 or 4 quarts (preferably metal). This eliminates the stone, spray bottle, pie tin and even thermometer.
a cooling rack
a big mixing bowl
a kitchen towel

The next installment will address mixing and baking.

Saturday, August 20, 2016

Making Great Bread - Yes, YOU. Part 1

Do you want to make bread? Do you want to make better bread? Several professional baker/authors have said that it is possible to make better bread in a home kitchen than they make in their commercial bakery.

YOU CAN make GREAT BREAD at home.

Before we talk about how - we should talk about - What is Great Bread? - Why make Great Bread?


What is Great Bread - In my opinion, Great Bread is bread YOU (and those close to you) LOVE to eat. Generally we talk about bread having 3 areas of measure: Crust, Crumb and Taste

Crust - Some people like crispy/crunchy/thick crust. I understand that this is how many European breads are - and in my neighborhood, my neighbors from Switzerland and France love that crusty bread.
But many Americans prefer soft crust like the wonder bread they grew up with.
Crust comes as a result of the dough and the baking technique. I can get a crusty shell on some recipes, but not others - even using the same oven technique.
A soft crust can be achieved on most breads with an oven technique intended for soft crust - and then placing a not quite cooled loaf in a sealed plastic bag so the moisture softens the crust a bit more.

Crumb - I prefer a light and tender crumb. That comes from a good rise (more than 2x) and not overbaking, but allowing to fully cool before cutting. But others want more of a bite to their bread - kind of like pasta al dente. My double flax bread is often like this - a good, almost meaty texture flecked with whole flax seeds. While baking technique has an impact on the crumb, I think it is mostly the recipe.

Taste - Aside from some caramelization of a 'well done' crust, this is almost exclusively a result of the recipe. At least 8 of my 12 approved varieties are built on the same basic recipe - to which herbs, vegetables and even other grains and fermentation time are added for flavor.

What is Great Bread to YOU? What combination of Crust, Crumb and Flavor results in YOUR favorite bread?
You say that you don't really have a favorite? What do you do? Take 3 months and taste all the varieties you can - and keep a log of what you like. Eat it as fresh as possible - and sometimes not as fresh as you would like (but you can fix that in your own kitchen).

Once you know what you think is the best bread - you have a target. Then research (there is a lot of info on line) recipes for that kind of bread. Make sure you read the baker's notes as to technique and other intangibles. Pick a few different recipes and try them out. And, don't think that just because it came out that way one time, it will always be the same. And, focus on the flavor first. If it doesn't taste good, the looks won't matter. Looks are one thing that can improve with technique and practice. Flavor changes from technique are much more subtle than the visual changes.

Why should you make Great Bread? You really have to ask yourself whether it's worth the effort. If you can go to your favorite bakery and get bread as good as you think you might be able to make it WITHOUT the practice and expertise you need - MAYBE you DON'T think it's worth the effort to do it yourself. My favorite pies are pecan and banana cream. But, at certain times of the year, I can buy a wonderful pecan pie from Costco and get my fill. I have made pecan pies, and they have come out great. But, it's just not worth it to make them at home when I have this alternative. Yes, many Costco locations have artisan bread - and our's just put in a new bakery. If they can meet your desire for Great Bread - why do it yourself. That's a decision YOU have to make based on your alternatives.

And, as you see below (and we will go into depth in the future), YOU will need to make a lot of bread before you can expect to make a handsome loaf of bread with the crust, crumb and flavor of your preference. Is it worth it to you to go through this practice??

YOU need to answer these questions.

If YOU still want to make Great Bread (and you can), come back next week for the elements of making Great Bread. You will also learn through this series, just WHY YOUR BREAD can be better than your local bakery (even Costco's bakery).

A teaser -
What will help you make better bread?
- Practice, practice, practice

- Focus on your style

- Use basic equipment

- Read what others are doing

Tuesday, July 19, 2016

PB&J for the Hungry? Can you do this? Yes, you can.


PB&J for the Hungry - probably more info than you want to hear.


Simple approach -
Get a

  • loaf (or two) of white bread (*)
  • a Jar of Jelly (I used Welch's Grape)
  • A Jar of Peanut Butter (I use Skippy's creamy - some of these folks have dental problems, so I stay away from the chunky variety)
On the Day of distribution
  • Lay out the bread slices (by pairs) on the counter (I put about 12 pairs out at once - which is pretty close to a loaf)
  • Spread the peanut butter (a good healthy amount that your father or brother would appreciate)
  • Scoop out some jelly on the other side - again, almost as much as possible (like your brother or father would appreciate - and still be able to eat without a bunch of napkins to clean up)
  • Fill as many zip lock (or other) sandwich bags as you need (I am able to place two sandwiches in each bag - why not fill them up?)
Place the sealed bags on a box (like the shape of a produce box from costco or something that is not too tall, but strong enough to carry all your sandwiches).  

At the appointed time, go to your appointed distribution spot.  Start out handing out one bag per person (and don't be offended if they decline your offer) and, if you have extras after making rounds, offer a second bag.

And, take a little time to chat with the folks you are serving.  How are they?  Are they enjoying the weather?  Do they have a roof?  Is their family in town?  

Respond honestly.  When appropriate, ask people if they would like you to pray for them.  Tell them when you will be back (and then keep your word).   I was surprised that some of the guys thought that 'jelly ruined a perfectly good peanut butter sandwich'.  No problem - next time, I brought some straight peanut butter sandwiches - and kept track of them, so I could deliver them to the guys who requested them.  

You will be surprised.  Treat them like God's children - beloved by Him.  

Yeah, you should probably go in teams of at least two persons -just cause.  Go to a place you have scoped out ahead of time - at the time/place you intend to visit when distributing.  Different places have 'meals' at different days of the week/month and the folks seem to 'migrate' as the opportunities arise.  

Details 
(*) - I make bread - so I make the loaves that turn into sandwiches.  They are not 'wonder bread' shaped - but they turn out a little different each time I do it.  Ignoring the cost of heat and labor, the ingredients cost about 45 cents a bag for about 24 bags of two sandwiches each (with each bag weighing about 6-8 ounces).  If you buy fresh bread, you would have to adjust your costs.  

I bake the bread the day before I am going to assemble the sandwiches and place them in a plastic bag overnight, so the crust softens.  I hand slice the loaves - trying to make the bread as thin as possible so it will hold the PB&J and not fall apart.  


Where - Actually, I tag along with some people who have a regularly scheduled 'feed' (two fridays per month) and hand out the bags after the folks have eaten their dinner.  The idea is that the PB&J sandwiches are for when hunger hits - in the night; in the morning; or whenever. 

If I was to try to find a place to do this - I would talk to people who provide services to the homeless and disadvantaged and get advice.  The goal is to serve them - so it's worth a little effort to figure out what that means.


When -  This one is for you:  When can YOU do this?  How often from a time and money standpoint does it work for YOU?  Can you commit for 3-6 months of doing this so that you can be regular and anticipated?  Is there another group where you can 'tag along' and help their 'clientele'?  
Remember, if it doesn't work for you - you won't keep it going - and it won't work in the long run.  


Do you have to do this MY way?

Absolutely not.  In fact, do it YOUR own way.  Do it the best way for the people you are feeding.  Maybe you will find out that PB&J is not what they need.  Maybe you will find that it's best to make your visit in the morning.  Approach this with doing what people need - and you will be doing the right thing.

I understand that I am lucky.  Someone else was gathering these folks - and I tagged along.  Maybe you can do the same  - tag along with another group.

And, if you would like to come see how it works - come see us.  Email me at BreadByDan@gmail.com and we can make arrangements.

I spend about two hours each afternoon on the 'feed days' slicing, spreading and bagging the sandwiches.  If you would like to help with that (in your own kitchen) let me know.


An Option - even Simpler...For You

I figure that it costs me (in out of pocket ingredients) about $12 per week.  Consider contributing $25 to cover the month.  Not deductible - just an investment in some people you will never meet.  If you DO participate with me - I will see what I can do to expand this effort - so someone else is making and distributing PB&J sandwiches to another group of folks in the San Diego area.  Maybe it will be someone who feels their heart tug when they read this post????  Maybe.  

And, don't forget to pray for those folks receiving the sandwiches.  They need so much more than a couple sandwiches twice a month.  We can lift them up a couple times and give them something to look forward to - but there are a lot of days in the month when we aren't there in the park.  

dan

Sunday, June 5, 2016

Delivery Charges

Delivery Charges - Why, When and How Much.

Background - Delivery is ONLY available in the UC area - preferably along the Governor Corridor that runs from 805 in the east almost to I-5 in the west.  That's because I don't want to spend  a lot of time delivering - rather making and baking and knowing that my customers are enjoying really fresh bread.  If the bread spends a lot of time in the back of my truck - it is less fresh than I want it to be when it gets to my customers.  And, I can't make more fresh bread while I am out delivering.  Maybe with enough delivery fees, I can hire a delivery driver???  But, even so, the routes would have to be short - so the bread doesn't age out of its prime in the back seat.

Why are there delivery Charges????
Because of the time it takes away from baking.  If you pick up the bread - the interruption is minimal and the delivery charge can be avoided entirely.  If you live on my street, then it's my pleasure and a good neighbor thing to deliver to your doorstep - no charge.

When do Delivery Charges apply?  Such charges apply for each delivery outside of my home street (and adjacent cul-de-sacs).  My 'good exercise' excuse (and discount) doesn't apply when I need to get in the car.  So, if I need to start up my car - there's a charge.  But, that means that delivering to a house near Sprouts is the same charge as delivering it around my block.  At least for now.  We will see how this goes.


And, How much are Delivery Charges?  Delivery Charges are $1 per delivery outside my home street.  Simple enough??  With most orders being a single loaf, this works.

But, you say, each loaf of bread outside of your home street is marked up with a $1 charge.  When I order 3 loaves, I get charged $3 for delivery.  What about that, you say?
Well - the Square system can't handle such detail.  My response - you will be charged the $3 in delivery fees as you order, but you will receive $2 in cash along with your bread.


Tuesday, May 3, 2016

Making Bread - What's Most Important???


Bread is pretty simple stuff.  There's only looks, feel from the outside, crumb  - texture, taste, holes - and the crust in your mouth.  Or put another way - looks, taste and texture.  So, of these three, what's important - and what is not?

I would propose that looks is the least important for the loaf you are going to eat.  Yet, it is probably looks that makes you choose that same loaf (unless you are able to taste it).

What's most important - I would say taste (including mouth feel).

If there was a fantastic looking loaf - that didn't taste good; or was too chewy or too stiff - who would want it?  It would be like those plastic sushi models that are in some windows.

If you found a loaf that didn't look so good, but tasted fantastic, then you found the diamond in the rough.  Keep it your secret or share it because it is the taste that makes you feel good.

But, if that loaf looks great AND, it tasted fantastic, then that's bread worth eating - even in a world of too many carbs.

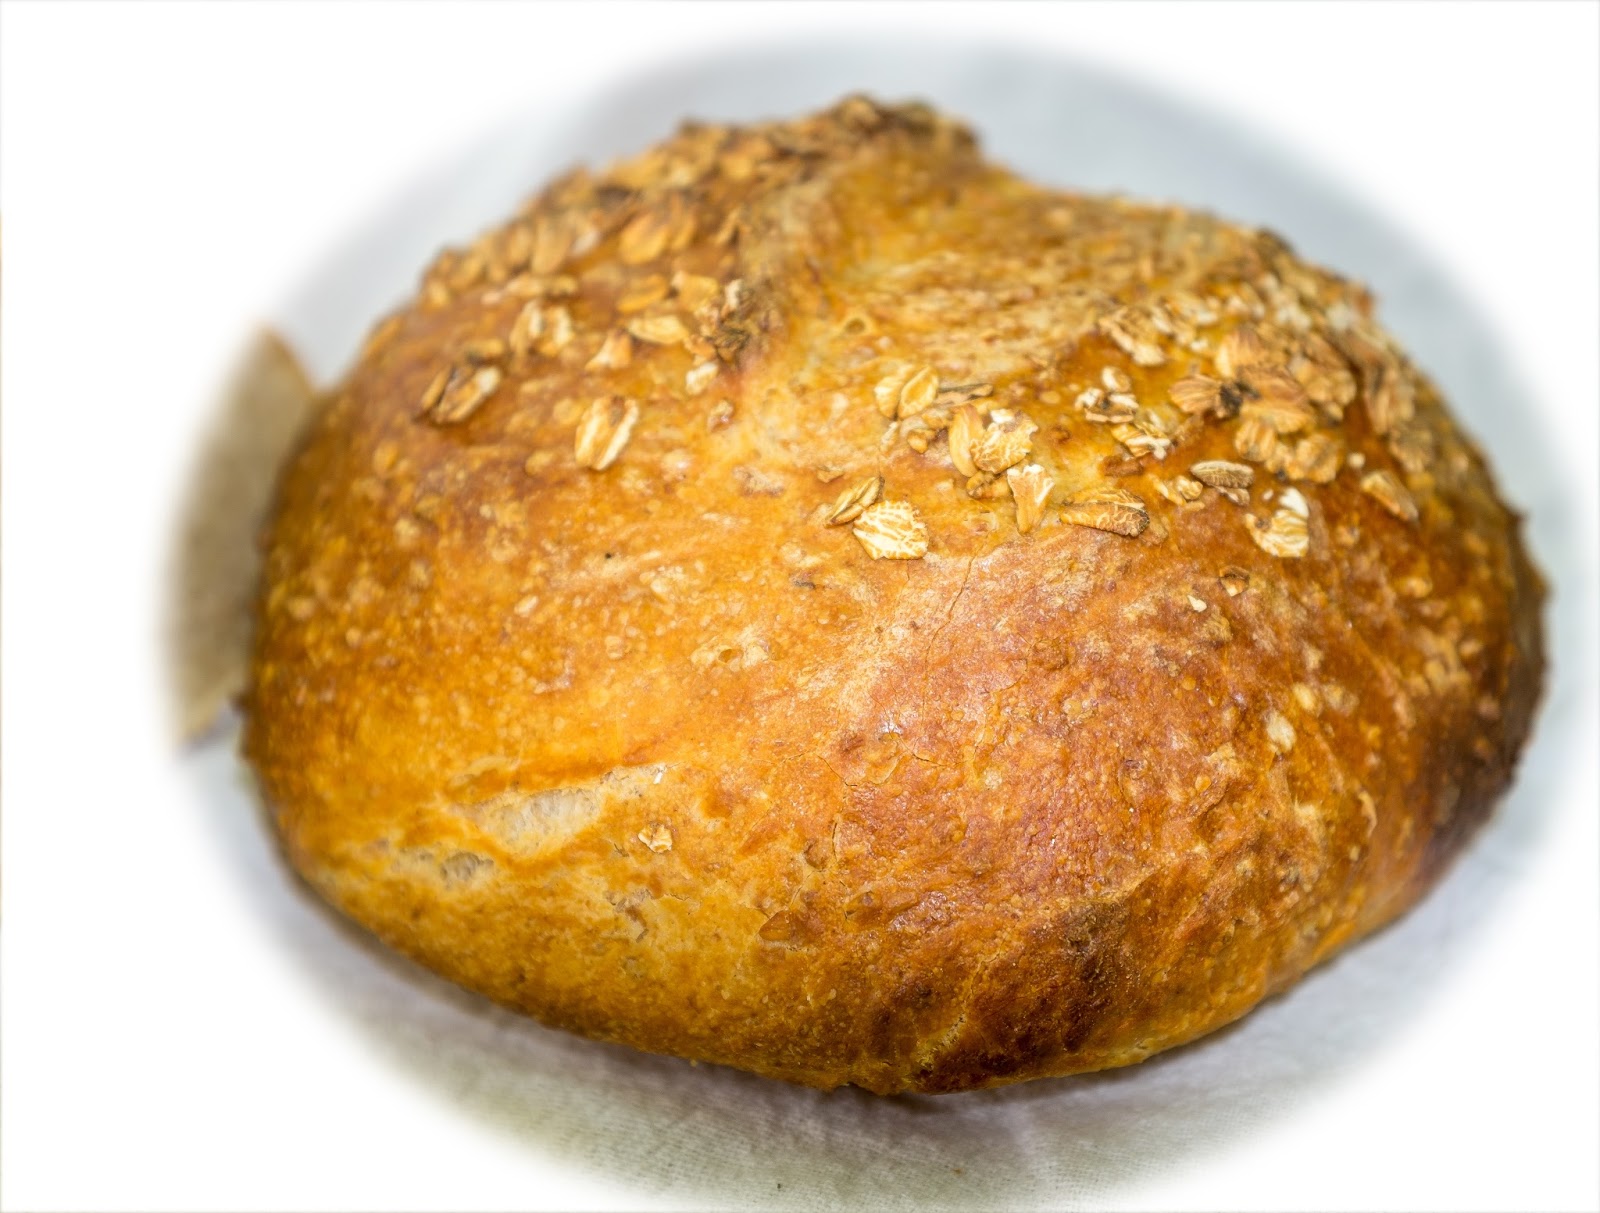
Oats n Wheat with fermented steel cut oats

Thursday, April 14, 2016

Fig n Fennel Artisan Bread


Black Mission Figs + Fennel Seeds = sweet fig flavor against a slightly licorice background with the crunch of fig seeds.  Crusty on the outside and soft on the inside.

18 oz loaves are just enough to be a treat with coffee or wine (or even beer), but not so much as to get tired of it.

It's a treat.  Of course, fresh bread of most varieties is a treat.  Enjoy.


Monday, March 14, 2016

A new bag of flour

When I get a new bag of flour - I transfer it from the 50# paper bag into several containers.  A couple of these sealable containers hold about 10 pounds each, one holds about 25 pounds and one about 5. I cut the 'identification label' off the bag and tape it the bucket.   I use a big scoop to transfer the flour - but I see the flour and smell it.  I see the consistency.

The flour is the foundation for the breads that will be built on it.  Whether it is the freshly milled rye or wheat berries that add heft deepness to the flour of the rosemary, thyme or dill that gives an altogether different caste to the lightness of the flour or the fig and fennel that provides the sweet/licorice-like contrast or the meatie texture that comes from flax meal and seeds added to the dough.

Then I think of what it will make.  Round crusty loaves for my customers - very soft on the inside and yet crunchy.  Flavorful from the resting time it gets with water and a little yeast, yet mild.  No preservatives, oils or chemicals added - just water, salt and yeast --- and time.

Baked on the stone - steam sprayed to help with the oven spring and crust building flavor.  Removed from the oven at it's finish temperature.  Only twelve approved flavors for sale - but endless opportunities to try.

And, the pizza crust - to hold the flavors that serve as a focal point for a family gathering.  It's a challenge to get that crust finished while also getting the toppings cooked, but not burned.  Subtle and bold flavors all held together with the crust which could be fluffy or crisp or somewhere in between.

And, the PB&J sandwiches for the homeless.  A hundred or more in the month.  Good calories and protein to tide them over  - as they take them where they go from the distribution point.

From a white powder in a brown paper bag on a big box shelf to joy and food and goodness.  Almost anything is a day away.  Smiles and nourishment and flavor and sustenance.   All in that bag - now in my kitchen soon to be in the hands of others.